Here is a tip for sanding backplates from
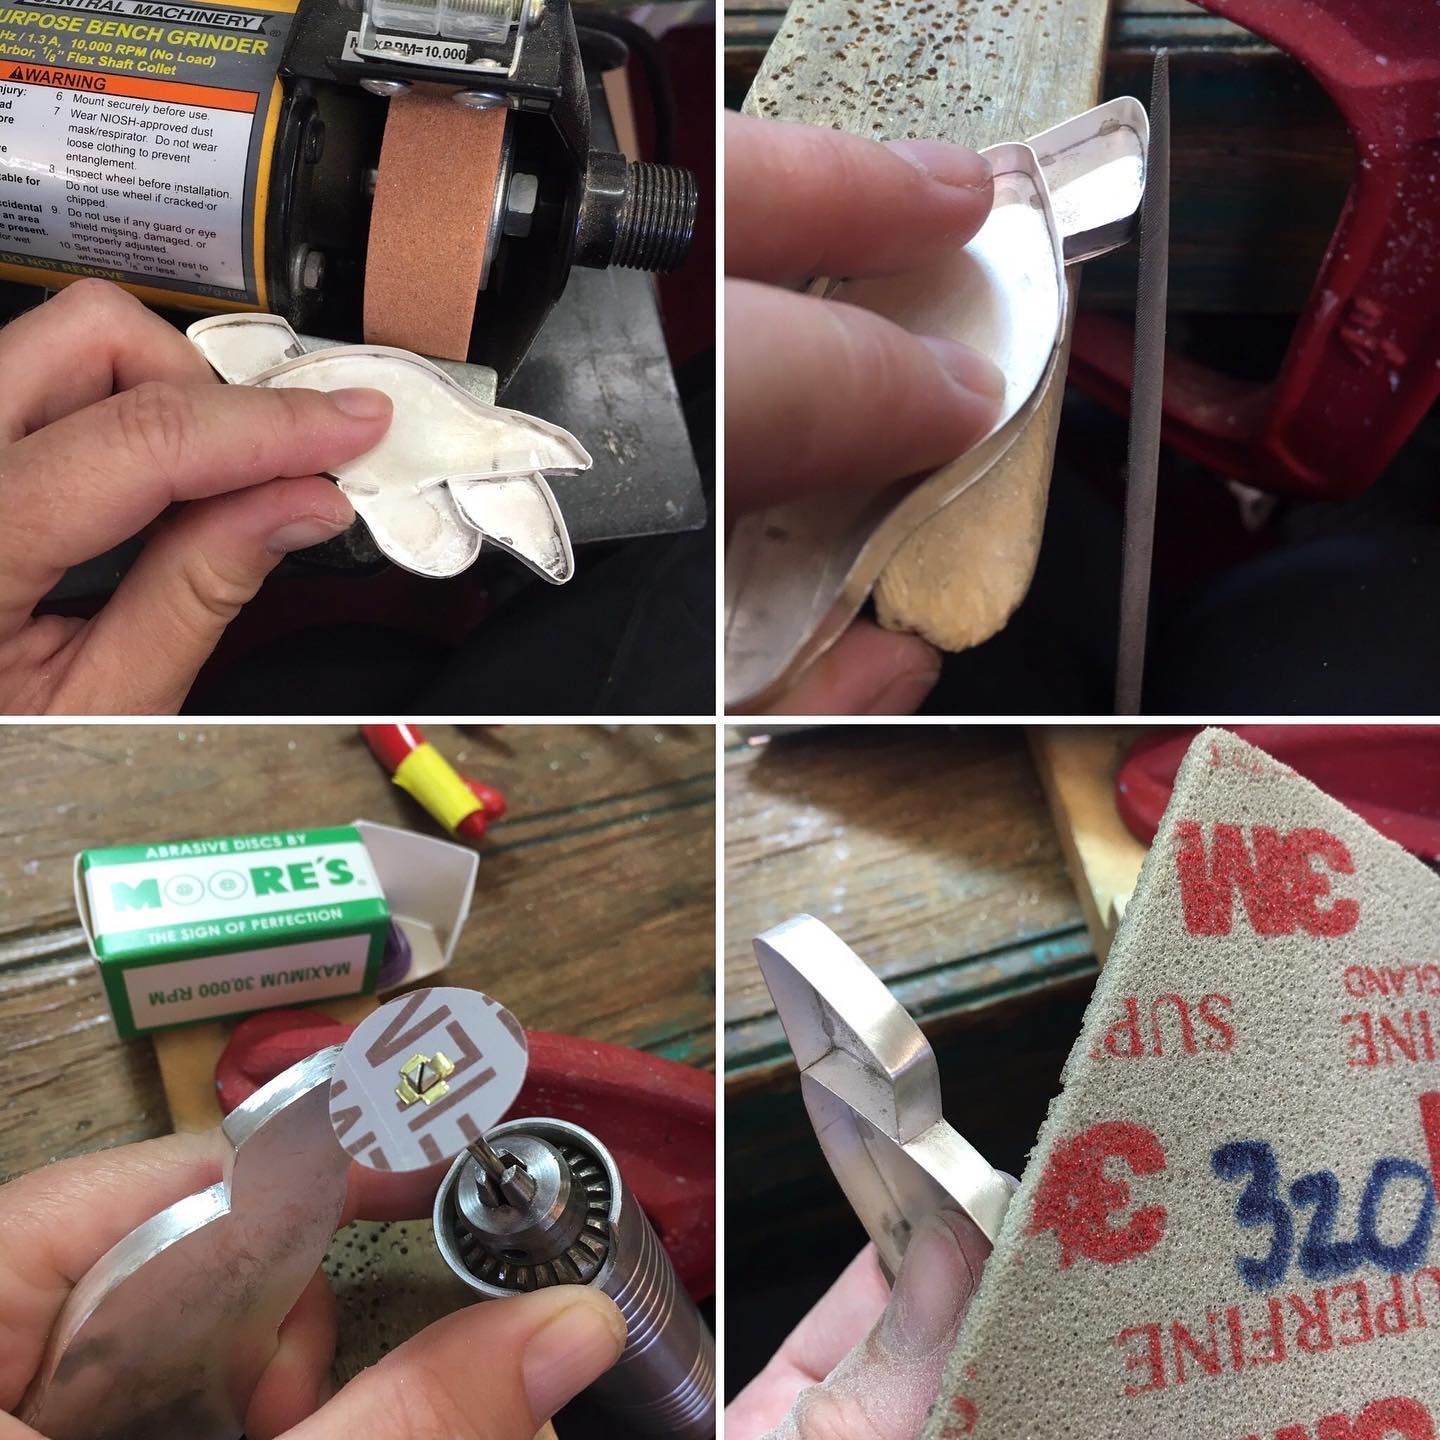
@jtower_jewelry - “Here is my process for making the back plate flush without killing your hands: 1. Saw around the piece close to the bezel (not shown in my photo) 2. Using my mini 3” bench grinder from Harbor Freight (sells for $37), grind excess very close to the bezel. Be careful not to grind into the bezel, as this grinder is very fast and effective. 3. Hand file any parts you couldn’t reach with the grinder. 4. Use the Moore’s snap-on (plastic backed) sanding discs to remove remaining backplate, and make the solder line blend/disappear into the piece. Start with “medium” then move to “fine”. You can buy both grits at Gesswein; Rio only carries the medium (220 grit), and a 150 grit I find too coarse. Pro tip: snap the sanding disc on with the grit side DOWN. You will have better control that way. 5. Use 3M sanding sponges for a final brushed finish, start with Superfine then use Ultrafine. I love these sponges, I use them on everything! I don’t always use the bench grinder, because I’ve gotten skilled at sawing close to the bezel line, then it’s only a little filing before going right to the sanding discs. But the bench grinder is cheap and has such a small footprint, and will be very helpful to people who are still improving their skills. I also use it to sharpen the pin end of my brooches.” Thank you for sharing this with us Jill! Super helpful!
#backplates #bezels #bezelmaking